By reading these lines you prove one thing -- you’re a responsible store owner in a search of ways to make your business more valuable and profitable. Most certainly, you’ve already tried implementing some of such techniques and hits on practice. But can you tell which of those does really have an impact?
If yes, then most probably you’re already utilizing one of website analytics tools to keep track on everything that happens with your store. If not -- this article is for you.
Google Analytics is the tool that allows you to collect the data on website traffic and customer behaviour, analyze and interpret it. By using it in a combination with a shopping cart, it can give you the insights to the relations between your actions and traffic, average order value, conversion rate, and so on.
In this article we’ll learn how to install Google Analytics on one of the most widespread e-Commerce solution -- WooCommerce. Being a WordPress plugin, it transforms the CMS into a shopping cart with an optimal correlation between the level of user-friendliness, customization and functionality.
How to Install Google Analytics on WooCommerce
Get the Tracking Code
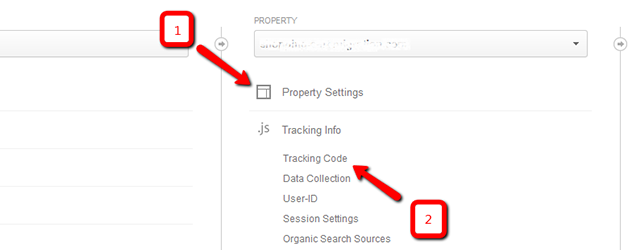
Firstly, you need to login your Google Analytics account or create one, if you haven’t done so before. Once you’ve logged, navigate to the Admin page.
Here, find the “Tracking Info” link and click it to show up the column below. Now, click “Tracking Code”.

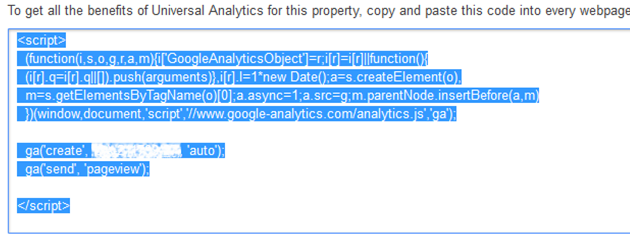
Clicking it should open a new window section with a snippet JavaScript tracking code which you need to copy and place it on your WooCommerce store.

Add the GA Tracking Code to WooCommerce
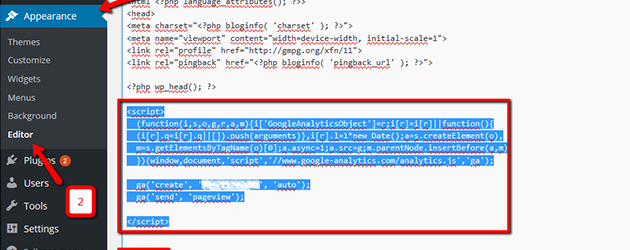
Get into your WordPress admin page and select “Appearance” from the instrument panel on the left. Then go to “Editor”. It should allow you to make changes to your WordPress theme files.
GA Tracking Code can be added either to header file of your website (header.php) or to footer (footer.php). We personally recommend to add it into header file, since GA script will run from the very beginning, no matter if the rest of the page loads or not. Otherwise, the script will run only when the very bottom of the page is loaded, which may distort the data because of users with slow internet connection.
So, find the header.php file (or footer.php if preferable) on the left side of the page and open it up. In the editor, locate the closing head tag in the upper part of the window.

Now, simply paste the Google Analytics Tracking Code right before that tag. Afterwards, save the changes to update the file. At this point, Google Analytics should be installed on WooCommerce.
Play a little bit with your website by clicking around, and check out the real time analysis from Google by going to GA Reports page. If some of the data is already there - everything should be working correctly. Congratulations!
Bottom Line
Google Analytics opens great opportunities for store owners allowing them to keep finger on the pulse of their businesses. However, to get the most of the tool you need to go somewhat deeper into its functionality, like setting up custom goals, variables, etc. For more info on a subject, check out an official Google Analytics documentation.


 March 31, 2025


